Managing files on the cluster (Filezilla)
To transfer and manage folders/files on the cluster, you can use Filezilla.
Simply install it. Then, in Site Manager, create a new site (give it the name CRNLcluster, for example) and set the following:
Option 1
- Host: 10.69.168.93
- Protocol: SFTP
- Logon type: “Ask for password”
- User: your cluster username (probably firstname.lastname)
Option 2
If you completed the SSH tutorial.
- Host: 10.69.168.93
- Protocol: SFTP
- Logon type: “Keyfile”
- User: your cluster username (probably firstname.lastname)
- Key file: path to the private SSH key created during the tutorial (e.g. crnlcluster)

Note that, by default, Filezilla might force you to select a .ppk file. To select your private key that has no extension, you will need to change the .ppk file filter to “All files”.

Good sides of Filezilla
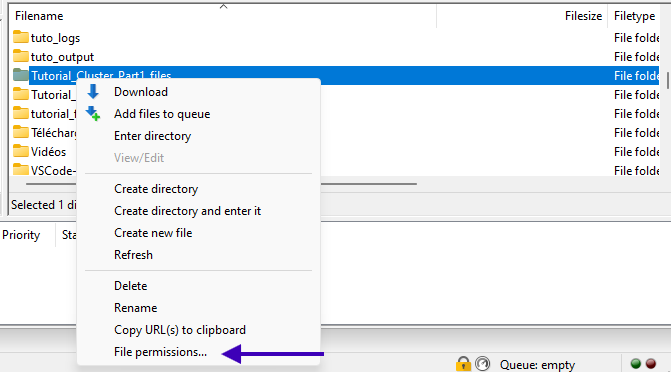
When using the cluster, you might sometimes struggle with Files and Folders authorizations. Those can be set in the command line with chmod, but Filezilla can do it for you in a more intuitive way. Just right click on any folder and select “File permissions…”
Another good side is that you can apply filters to upload/download files in batch, including or excluding files according to specific criteria (types, sizes, etc.). Check “View -> Directory Listing Filters”.
Leave a message
Feel free to comment, make a question, report a bug, etc. If you want to notify a specific user (e.g. to get a faster response), you may include their Github handle in your message (e.g. @romainligneul or @samuelgarcia).